Last May, I decided to build a file server for my house. I got a free P4 HT processor and video card from a coworker, and I bought a motherboard, RAM, heatsink, thermal compound, and hard drive for it off of Newegg. I used an old case, power supply, disk drive monitor, keyboard, and mouse that I had lying around, and I hooked it up to my stereo for audio so it could also serve as a jukebox for the house. I loaded Ubuntu Linux on it, so there's no software cost other than the cost of the CD-ROM that I used to create the installation disk. All told, the thing cost me around $180. Not bad for a 2TB network drive that's also a fully functional spare computer.
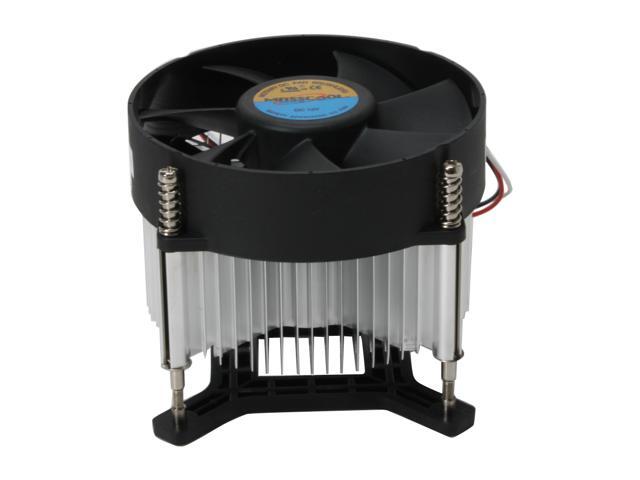
Clearly, I was pretty frugal with parts. I got the cheapest heatsink for my application, and not the most expensive RAM (though I did max out the board). The hard drive I wanted was on sale for $75, which was one of the motivators for doing the project when I did. Here is the Newegg product image for the heatsink we're dealing with.
I was happy with my purchase overall, until the rig started making unwanted noise. I was busy with school, so I didn't really have time to diagnose and troubleshoot. Today, I finally got around to fixing it. The culprit was the fan that came with the heatsink. The "long life" bearing had gone bad, and the cooling fan only worked intermittently. When it did work, it made a horrible rattling sound.
I needed a quick solution. I didn't want to wait for shipping. I had time today, and that's when I wanted to fix it. I visited Radio Shack to see if they had any solutions. The stock fan was 90mm, but the mounting holes were spaced the same as a standard 80mm fan, which they had in stock. The one brand they carried in that size was Thermaltake, and the price was $11. I had heard good things about their products, so I was sold.
The Thermaltake fan had just one problem: it was a case fan. For some applications, that's not a problem. In my case (LGA 775), however, there was a fitment issue. Case fans have mounting holes on both sides, which normally allows them to be mounted in a variety of ways. The same fan can be used for either intake or exhaust in any given position. The way this bad boy mounts, the rear mounting tabs get in the way, so I had to go after them with a hacksaw. Here is the result.
 |
| As noted in the comments, I mounted the fan upside-down. This is not optimal, but it still works well enough for my lightly-overclocked application. Learn from my mistake. Measure twice, cut once. |
As you can see, I just cut the corners off of the outward-facing side. I used the screws off old fan, which were a little tricky to get out of the old fan. They were retained by a sort of locking collar. Wire snips would have been ideal for removing them, but they had gone missing, so I instead used a pair of needle-nose pliers to twist and break the collars off. Everything went together without a problem. I'm pretty sure the collars were on the screws just as a weak deterrent to keep consumers from doing exactly what I did. Here is a blurry close-up of three of the broken collars (one to be found later in an inconvenient way, no doubt), to give you an idea of what I was working with.

The new fan works like a dream. The blue LEDs work well as a night light so I can find my way to the lamp. The smaller fan turns at a slightly lower speed than the original (2000 RPM vs. 2400), so it's quieter, but it blows well enough that I can still overclock the processor because the heatsink is huge and doesn't need much airflow. I pronounce this operation a success, and I recommend it for anyone in a similar pinch.
The new fan is mounted upside-down
ReplyDelete